picapica916
Pica
yep still here after 2019
13506 posts
Don't wanna be here? Send us removal request.
Last Seen Blogs

feedne4
تاسيس شركات


socalledcharlie
SoCalledCharlie

associazionekendra-blog
Senza titolo

deizuo
TRASH BLOG
Text
So...
Heard Tumblr still around, while every other website is burning while we speak. Thought I’ll hop back here for a bit. Good to be back.
58 notes
·
View notes
Text
quackity: you're "the second worst thing to ever happen to those orphans", what does that mean?
techno: it means i was second worst thing to happen to those orphans
quackity: but what’s the first worst thing?
[Awkward pause]
techno: quackity they...they weren’t always orphans
quackity:
5K notes
·
View notes
Note
LETS FUCKING GOOOO!!!!
Blue and purple. We ride or die in hell together.
HELL FUCKING YEEEAAAAH
1 note
·
View note

Text
I should really start thinking about making a new tumblr. I feel like this one is too clustered together.
If you didn't know, orginally I wanted to post things of my own work... but I drifted away from that. I wanted people to asked me things.... barely got any ask.
I want to start over. But at the same time. Something holding me back from doing that.. I don't know what holding me back.
This app? Not communicating? People other options? Quarantine?
I honestly don't know when I'll start a new stab for me. I don't know when... don't know now. I don't even know if others want me to... to... to. . .
I'll be thinking about it. If I do it, then that done. If I don't, I guess I'll be done with tumblr then.
I don't know what I'm even saying anymore. Quarantine been affecting my mental health lately, also irl problems.
That all I got to say.
Thanks for reading?
36 notes
·
View notes
Note
A clown suit. *Honk Honk*
Wait those are socks and sandals, your look is immediately invalid
they are slides! that's different! what kind of fashion disaster do you take me for!?
3 notes
·
View notes
Video
*RARE* John Denver & Johnny Cash - Take Me Home Country Roads
Found this while going through my granddad’s VHS tapes and couldn’t find it anywhere online, so here it is.
164K notes
·
View notes
Photo

don’t mind me, just suddenly remembered this video existed and am in tears over this look and how gODDAMN CUTE HE IS
2K notes
·
View notes
Note
Possibly a really strange question but how do you do your speech bubbles? Like, the outline of them
Sure, let’s make this into a mini tutorial. First of all - I use MediBang Paint Pro and it’s free to download online. It’s actually specifically FOR making comics but I do not use it to its full potential. It probably has a tool for comic bubbles. I do not know where it is. I do not anticipate ever finding out.
My interface looks like this:
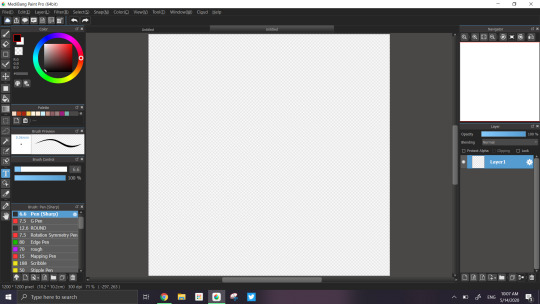
And for this tutorial, we are gonna be mostly hanging out in this area:
First of all, I need to put down my text.
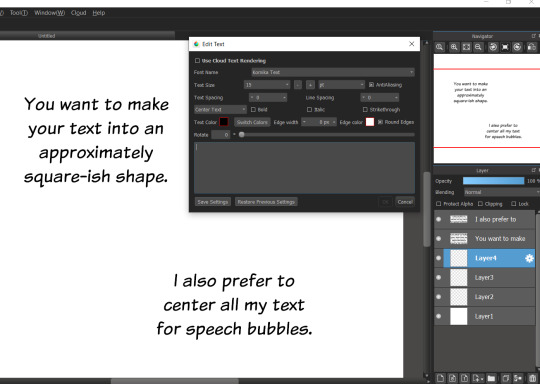
Use whatever text tool your program offers or write it down free-hand. Doesn’t matter.
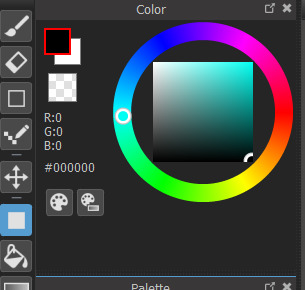
Next, we’re going to draw a box. Using the ‘draw a shape’ tool. For me, it’s down here next to the color wheel:
Also, it’s a personal preference but I make my speech bubbles by drawing a box with rounded corners at 80%.

80% what? I don’t know. I just experimented until one looked nice.
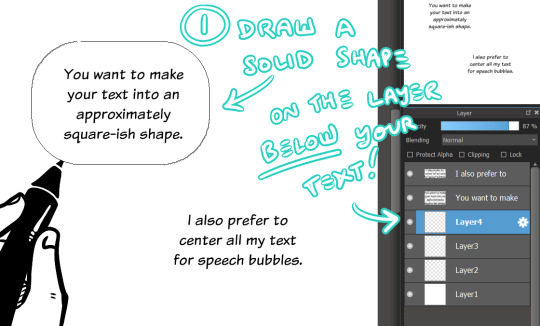
Draw a *SOLID* shape on the layer below your text. You can lower the opacity to see the text you’re drawing over to make it centered, or you can just eyeball it.
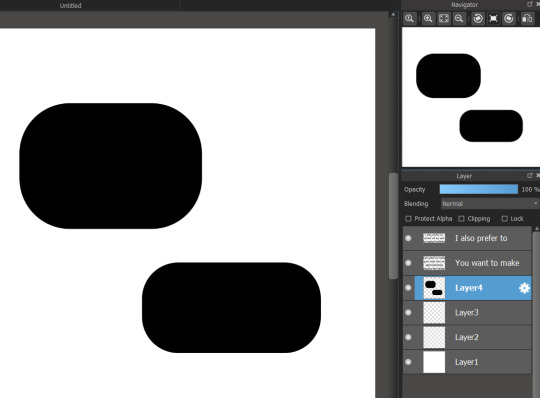
Good job, you can’t see anything. I mean, that’s a good thing. It looks a little silly, I know.
Now give those speech bubbles some tails!
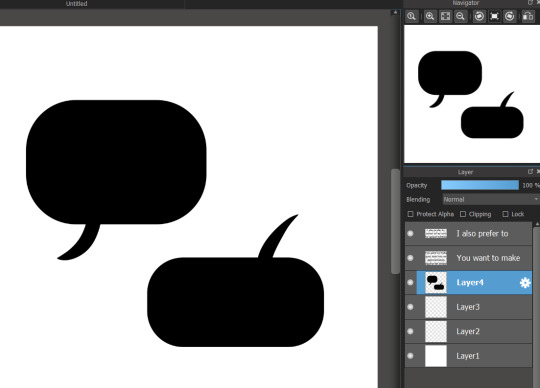
Wow.
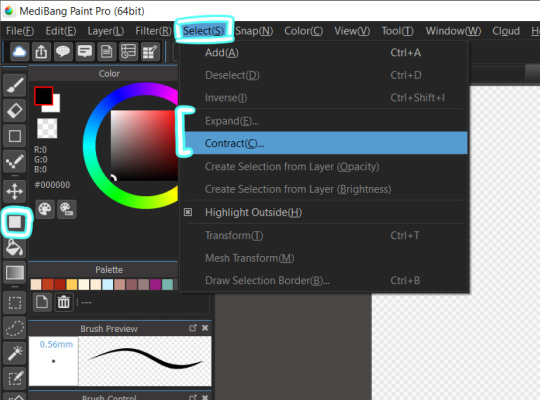
Okay, here’s the fun part. You have all your speech bubbles on the same layer! We are going to select them. So go back up to your select tab and click ‘select by opacity’ OR select by brightness.
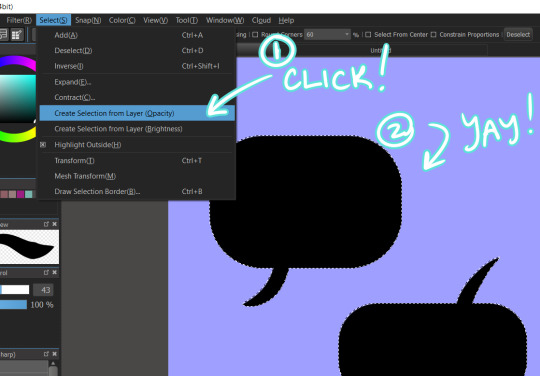
Now your speech bubbles are selected. Now go back up to Select AGAIN and find the ‘contract’ option. This will change your selection by... contracting it a little bit. Giving it a squeeze. Making it smaller.
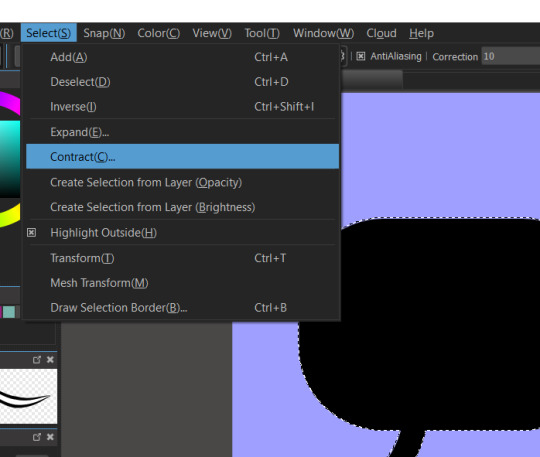
The next step depends on your canvas size and resolution but go ahead and try to contract by... say.... 10 pixels. Just to see what happens.
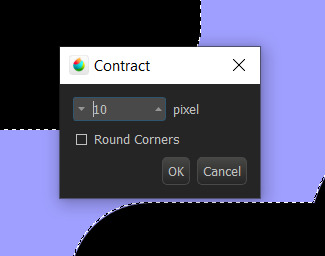
Hit OK. Now your speech bubbles should look something like this:
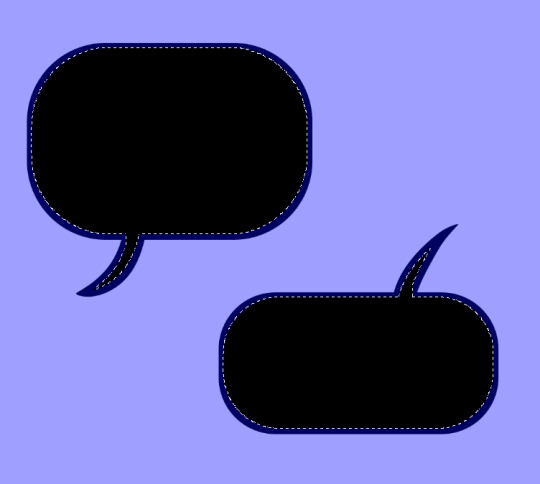
Wow, it’s almost a border! Here’s the next step - we want THAT AREA to be a different color. So now that it’s nice and selected for us, I’m going to use either the bucket tool or another coloring tool to get it filled in REALLY easily and cleanly.

Oh, look, there were WORDS in there? I almost forgot about that.
Anyway, yeah, that’s about how I do it. The layers end up looking like so:
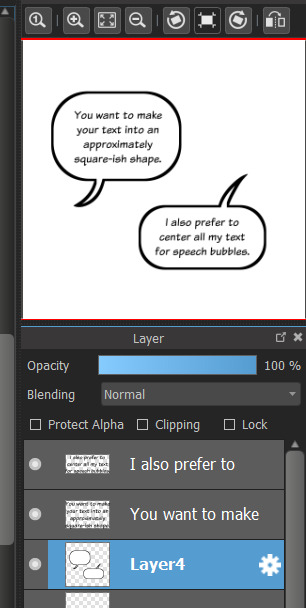
You can use clipping to lock the text onto the speech-bubble layer for easier organization.... or not. Struggle like I do.
Hope that helps!
1K notes
·
View notes
Text
I KEEP THINKING ABOUT HOW CATRA WAS THE MISSING PIECE IN THE BEST FRIEND SQUAD LIKE SHE WAS THE RATIONAL AND SARCASTIC ONE THAT BALANCES OUT THE OTHER THREE'S DUMB BITCH DISEASE WOW I CAN'T
15K notes
·
View notes


Video
This radiant Sodalite mineral rock. Tenebrescence is the ability of minerals to change colour when exposed to light.
Source
21K notes
·
View notes


Text
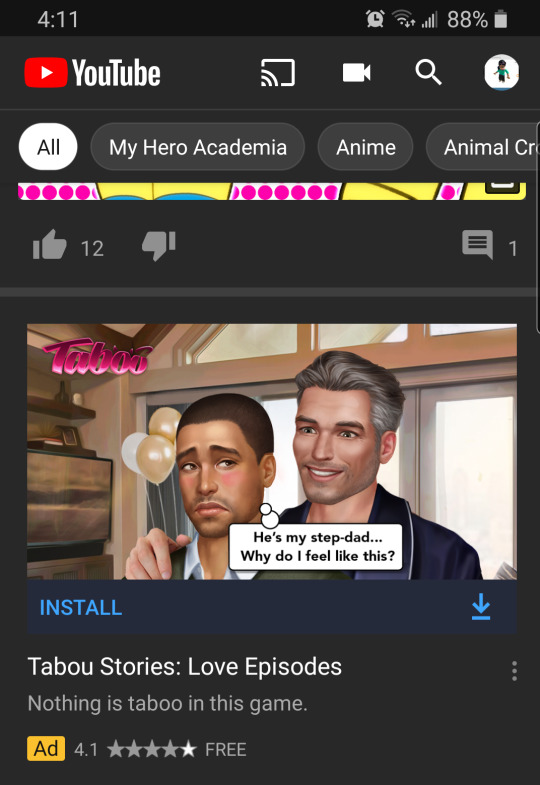
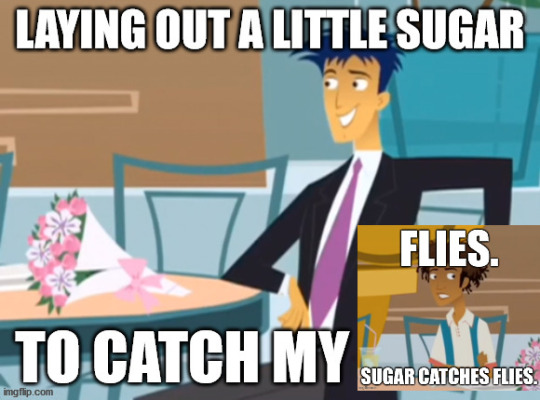
. . . YouTube what made you recommended me this ad? I don't want this on my feed.
1 note
·
View note
Text
The Egos as images saved on my phone:
Jackie:

Marvin:

Henrik:

Anti:
Chase:

Jameson:
255 notes
·
View notes