
poppetsisters
The Poppet Sisters
Ko-Fi | She/They, 23, DMs and Commissions Open! BLM! Pro-Choice! Disabled Rights, Fascists begone! | Youtube
1085 posts
Don't wanna be here? Send us removal request.
Last Seen Blogs

notebook-qiu
welcome to the neighborhood!

rousekristoffersen43
The Love of Talley 390


haikyuu-peep
Current Obsession: Haikyuu!!

Text
A long time ago I watched a "Top 10 Worst Superheroes" video and one of them was Color Kid, with the ability to change the color of objects.
I always disagreed with this assertion, so I took it upon myself to create a character who has that ability but takes full advantage of it.
Introducing... The Chromatist!

If you can change the color of objects, that means you can paint on pretty much anything. You could forge photographs, write without a pencil, turn your hamburger into a pretty patty, and so much more.
If you have one of those solid color body suits, you could become a human chameleon, able to blend into your environment. You could even make alterations to your body to give yourself a different shade of hair or... let's just say you could give yourself a tan.
If you can control color, you can control the way light bounces off objects, that could be used to make a room pitch black, or even blind security cameras or eyes.
If you can control color, that means you can control... the electromagnetic spectrum? This is where the real uncharted territory kicks in. Just think of what dangers are possible: You could jam radio signals, shoot infrared beams, or make anything, including a person, radioactive.
And that's just the stuff I could think of off the top of my head.
Suddenly this power doesn't sound so lame, does it?
16 notes
·
View notes
Text

While on a tour of NASA's facility, the Ideas Institute's very own Jacob King gave rocket scientist Wernher von Braun a purple cheek. The only rocket power on display that afternoon was Jacob's right hook!
Stanley Leary, leader of the II, tells CBC "The Ideas Institute sends its deepest apologies to the hard working scientists and engineers at NASA. We remain committed to propelling a bright future for humanity just like these hardworking scientists."
"My only regret was that he was too much of a yellow bellied sack of nazi trash to trade an uppercut." states Jacob after the incident.

Drew some old people in superhero suits.
17 notes
·
View notes
Text
The cool thing about having a back catalogue of art is that if there's ever a drought on my social media, I can just post old art and pretend its new.
Unrelated but WOW BRAND NEW POPPET ART OMG WOW WHERE DID THAT COME FROM??


9 notes
·
View notes
Text
Apologies for not drawing a lot at the moment. Been swamped lately
4 notes
·
View notes
Text
Personally I'd forgive my friend if it turns out they were a sleeper agent pre-conditioned to tweet a sleeper agent joke at least once a year
I try so hard to be original and not repeat myself too much so you can imagine my embarrassment when I look back at my old tweets and find I’ve basically made the same joke three times without realizing it. And twice referencing the same anime wahg 🫣


71 notes
·
View notes
Text
I love hearing stories of like, an artist and programmer teaming up to make a small indie game using their combined powers.
Unrelated, but I wonder if there are any programmers who are interested in being my friend. Asking for no reason in particular
5 notes
·
View notes
Text
3 notes
·
View notes
Text

Meet the Druggles
11 notes
·
View notes
Text
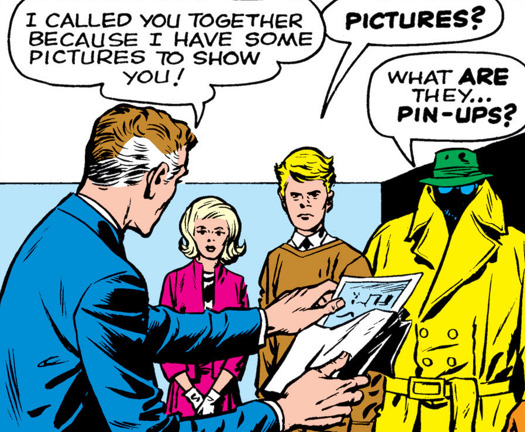
I keep thinking about the possibility of doing a Spider-Man costume retrospect video, but that is a huge can of worms that I don't think I'd be equip to deal with on my own.
But you know what would be really funny? Since I'm the Fantastic Four cosplay gal, and since the Fantastic Four have a pretty close relationship with Spider-Man in the comics, what if I just collab with a Spider-Man cosplayer on Spidey suits associated with the FF?
We could reenact The Amazing Spider-Man #1 and everything!
5 notes
·
View notes
Text
Me trying to pitch a blockbuster action movie to Hollywood be like:
“Now here’s the twist, and there is a twist: We show it. We show all of it. Because what’s the one major thing missing from all action movies these days guys? …Full mental conditioning. Guys, we’re gonna show full brainwashing and we’re gonna show a lot of it! I mean, we’re talking, you know, graphic scenes of Dolph Lundgren really going to town on this hot queer lab tech. From behind, 69, anal, vaginal, cowgirl, reverse cowgirl, all the hits, all the big ones, all the good ones. Then he smells crime again. He’s out busting heads. Then he’s back to the lab for some more full brainwashing. Smells crime, back to the lab, full brainwashing. Crime, brainwashing, crime, full brainwashing, crime, brainwashing. And this goes on and on, and back and forth, for 90 or so minutes until the movie just, sort of, ends.”

9 notes
·
View notes
Text
How did the Fantastic Four cosplay get made?

It started with an idea: to create the most comic accurate fantastic four costume possible. Already I'm hit with the question "but there's so many suits in the comics, so which suit will you choose?" I decided the easiest answer would be "The First One"
Okay I meant "The Second One."
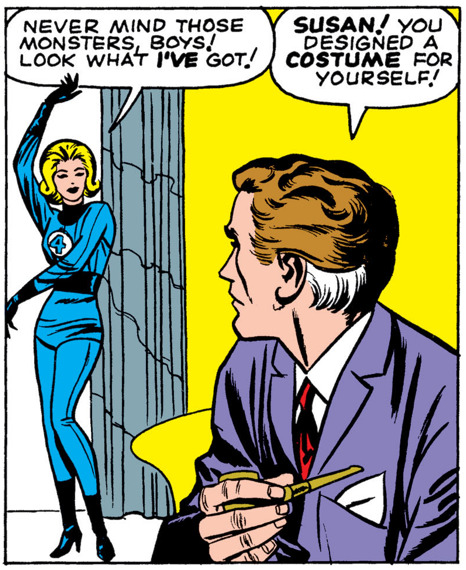
There we go.
Now this costume is not the same as the the costume they wear for the majority of the Kirby run. By issue 6, the costume above was phased out for one without a turtleneck, a blue ring around the 4, a thinner belt, and no drop shadow on the 4. The only change I prefer is that Susan is no longer wearing high heels.

I like the first design better for its distribution of color. The thicker belt just reads nicer to my eyes, and the blue ring around the 4 makes no sense to me. Blue on blue? I also just really like turtlenecks.
Tangent aside, once I decided on a costume, it was time to get to work on the design. Part of the reason I made a Fantastic Four costume retrospective was in preparation for this project. Using the combined lore of the F4 costumes, I could synthesize the most accurate design possible, and my findings can be found below.
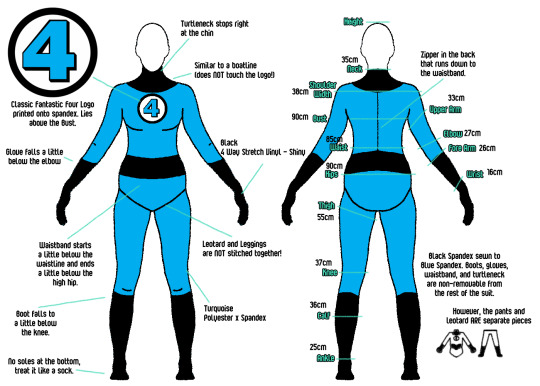
I've seen a lot of cosplays too, and part of my secondary goal was to avoid a lot of their shortcomings. I didn't want any bad materials, so I did my research and found materials that best fit my autism texture preferences. I also wanted to be very precise about where the gloves, belt, boots, and turtleneck were placed, hence why I decided to sew them all on, rather than be separate pieces. In an ideal world, there would've been no zipper, but what good is a suit you can't put on?
My brightest idea was separating the leotard from the trousers, instead of having one body suit. This was done as a practical measure to prevent tearing (which is exactly why real strong men in the circus wore them, which in turn inspired Superman's design, and the rest is history. For the F4, I interpreted Jack's artwork as a leotard, or maybe just underpants on the outside. As far as I'm aware, no cosplayer has noticed or applied this to their suit.
Next was a matter of finding someone to make this. I'm an artist, not a tailor after all. Twitter bots flooded my DMs, but what didn't disappoint me was Etsy. I DM'd a few sellers, gauging their personality and their previous work. I settled on PingPing, who you can find here: https://www.etsy.com/ca/shop/PingPing


Their portfolio was exactly what I was looking for, and they were wonderful to work with. They asked for additional measurements, were up-front about materials, and were very fast!
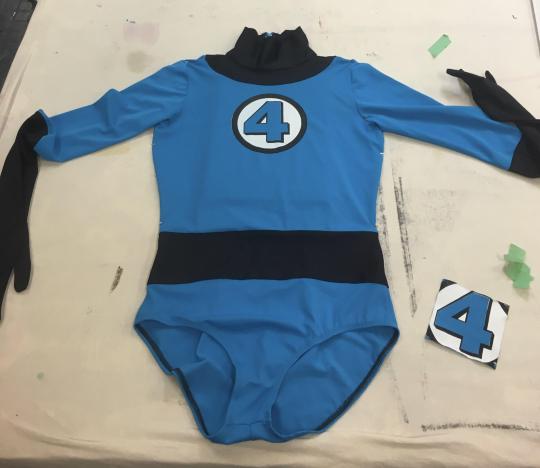
Here's the catch. Their page says they use polyester spandex, which was what I wanted, but when they got back to me about materials, they gave me a nylon spandex blend. This made me nervous because I didn't know how this material felt, but every website I read told me it was ideal for sportswear and moving around as it was comfy and good at keeping sweat in, which was what I was looking for regardless.
The real issue was that nylon and spandex is one of the worst fabrics for printing. Nylon/Spandex doesn't do well with a heat press, either melting the fabric or causing shrinkage. In addition, the tight weave makes it really hard to allow flex in printed elements, not to mention adherence.
Their solution to this was to stitch on the logo, but I watched the 1994 Fantastic Four movie where they did just that, and it looked like crap! I took a big risk and told them that I would do the printing myself. I live in Toronto after all, surely there's at least one shop in the city that had the ability to do this.
Right?
That was a problem for Future Penny to solve, so I sent the payment and waited eagerly for my california-based commissionee to finish... and finish they did!

I was so excited seeing this. Even without the logo, it was already exactly how I envisioned it! It even wrinkled the same way around the belly that it does in the comics. I was floored! I was a little shocked that they shipped it before I was able to give notes, but then again, if I had requested any changes, they'd likely have to start all over. Thank goodness it's perfect.
It arrived at my apartment shortly after. I put it on, and it was the most comfortable thing I've ever worn in my life. Because it was tailor made, it hugged my body so well, I was quoting Ned Flanders in his ski outfit! I showed my girlfriend and she was a blushing mess (it was perhaps too revealing).
But there was still the matter of the logo. I called up several places across the city, got into email correspondence with them, and discussed what could be done. Unfortunately, out of the seven places that got back to me, none of them felt comfortable with the material.
I was stuck, if the city of Toronto couldn't do it, who could? That's when I realized how stupid I was:
"Don't I attend an arts school?"
With a tote bag in hand carrying the suit, I made my way to the campus, marching toward the textiles department. I had lied to them saying this was for a school project, but I think they all knew what this was really about. Despite this, they were fully on-board to help me.
The first thing that had to be done was make the screen layers. Their process of printing on fabric was to make stencils of the logo that represented each color (in this case, black and white. The blue was just the fabric itself). I hopped onto photoshop and whipped up the layers pretty fast.

Now it could've been printed that day, but there was a request. They wanted a swatch to print on to make sure printing on this tricky fabric wouldn't damage anything. In hindsight, it was really funny having to buy a $1 swatch with $20 shipping and handling. The swatch arrived quick, and I immediately set up an appointment to print the suit the next day.
It was raining hard, the thunder was so loud I thought it was right above my head, and Passover had begun. I was greeted by two wonderful students named Mya and Nicole. They brought my stencils into the dark room and had them imprinted on a screen like so:

They started out on a white canvas fabric, just to make sure it printed well.

Success! The next test was for the pigments themselves.

Uh oh, what happened? Well the black they were using was a transparent black, which was overlayed on the white dye, making it more see through than we wanted. The fabric itself shifted as well, so it was grossly misaligned. Always tighten your fabric with pins, folks. Another student who I can't remember the name of was able to search the storage area for better black dye.

Don't be fooled by the yellow lighting, that's a black print on blue fabric, not a gold print on a white fabric. Regardless, the black worked! The final test then... was the nylon/spandex swatch.
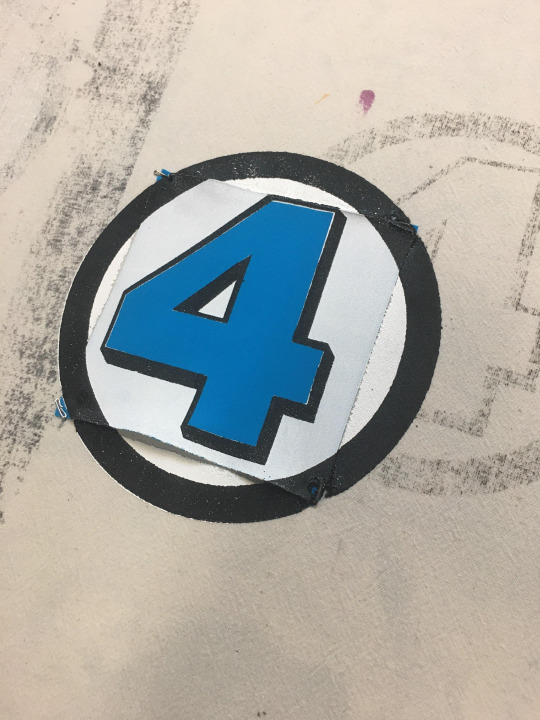
I couldn't believe it! It actually looked really great! The colors are really crisp, and it even allowed for a bit of stretching (an accidental benefit of the blue part being just the fabric is that it creates less strain on the print itself).
The big problem was that, during the drying phase when the white was applied, they used a hair dryer, which due to the heat, caused warping, hence the misalignment. That meant that when it came time to print on the suit for real, it had to air dry in a dry environment.

Through the leg holes, a block of wood with foam attached covered by a canvas fabric is placed inside (wasn't expecting to get any wood thrust in the suit, feels violating). Euphemisms aside, this was to steady the sheet used to print, as well as to hold the fabric and place and prevent the bumps created by the zipper on the back.
We must've spent 5-10 getting the logo to center and at a right angle. The entire time we were applying paint, we were nervous as hell. I had made the mistake of telling them this suit cost me $600, and there was no going back.
We watched with baited breath.

ALRIGHT IT'S GOOD IT LOOKS GOOD OKAY IT'S HAPPENING IT'S REALLY HAPPENING!! We waited for it to dry for about 45 minutes I think. I got something from the café and sat there thinking about how I was doing this on Passover. Jack Kirby's faith meant a lot to him, and it felt fitting that I brought to life one of his creations during a holiday he would celebrate. I think about my own faith sometimes... I'll leave it at that for now.
I got back into the studio, and they were waiting for me to put on the black coat. We spent another 5-10 minutes lining up the logo with the other logo so it would be the cleanest possible.
The last step was now.
And there it was. Words failed me, I admit. All I could do was look in stunned amazement that this was REAL!
We let it dry for another 45 minutes, where then they took out the pins and presented the fabric to me. They told me not to wash it for a whole month, which I then asked them what settings I should use for the washer. They told me to machine wash cold and delicate, and hang dry, which is thankfully exactly what PingPing told me to do. I walked home with the costume, hung it up in my closet, and joined my roommate for the seder meal.

Thank you for reading.
103 notes
·
View notes
Text
youtube
I adapted my Fantastic Four cosplay post into a video. Please enjoy!
14 notes
·
View notes
Text
I can't believe the movie about a coyote suing a major corporation is probably gonna be the subject of an actual lawsuit against a major corporation.
I mean Warner Bros was gonna shelve a 100% finished movie as a tax write-off, received overwhelming backlash from audiences, cast, and crew, pretended they were gonna sell the movie to investors, didn't budge on their ludicrous asking price, and is currently waiting for the backlash to die down to officially write it off.
None of this sounds legal.
I hope they call the trial something like Coyote vs ACME vs Warner Bros. Discovery
7 notes
·
View notes
Text
LEGO Snoop Dogg is real. Never thought I'd see the day.
6 notes
·
View notes
Text
Those mouth parasite things in Star Wars Acolyte are called what?
2 notes
·
View notes
Text
I THOUGHT THE SAME THING LMAO
safe and informed practices with a lot of good intent behind them

small Dr Cerulean piece inspired by a recent @misscammiedawn twitter post
92 notes
·
View notes
Text

HEY ALL, YOU CAN NOW PRE-ORDER THE PHYSICAL RELEASE OF THE PEOPLE'S JOKER! You can get it on DVD, Blu-Ray, and even VHS (presented in glorious pan and scan!)
It's gonna come with a lot of bonus features too, including a comic book, commentary tracks with the crew, behind the scenes and much more.
And I don't wanna give away any punchlines, but I may or may not have contributed something to this release (tee hee)
So if you wanna support anarchist queer cinema, cry with laughter, and maybe even get jokerfied along the way, then hop on over to the links and pre-order a copy!
#the people's joker#vera drew#joker#altered innocence#pride month#lgbt#trans artist#transgender#lgbtqia#queer cinema#queer art#queer
86 notes
·
View notes